2.5 文本
Manim中的文本主要可以分为两类,分别是非LaTeX文本和LaTeX文本。前者使用Pango,归为text_mobject类;后者用LaTeX,归为Tex_mobject类。非LaTeX文本有三种:Text、MarkupText、Paragraph。LaTeX有五种:Tex、MathTex、Title、BulletedList、SingleStringMathTex(不谈)。除此之外,还有code_mobject类的代码文本及numbers类的数字型文本。
2.5.1 Text
class Text(text, fill_opacity=1.0, stroke_width=0, *, color=ManimColor('#FFFFFF'), font_size=48, line_spacing=-1, font='', slant='NORMAL', weight='NORMAL', t2c=None, t2f=None, t2g=None, t2s=None, t2w=None, gradient=None, tab_width=4, warn_missing_font=True, height=None, width=None, should_center=True, disable_ligatures=False, use_svg_cache=False, **kwargs)| 方法 | 属性 |
|---|---|
| font_list | animate |
| init_colors | animation_overrides |
| color | |
| depth | |
| fill_color | |
| font_size | |
| hash_seed | |
| height | |
| n_points_per_curve | |
| sheen_factor | |
| stroke_color | |
| width |
继承自
SVGMobject
生成文本的最简单方法是使用Text类。除了输出英文字母,它还能输出非英文字母的语言,例如中文、日文、韩文。示例如下所示。
官方文档中介绍的就是中、日、韩语言都能显示,但我实操的时候发现韩语显示不出。这也无伤大雅,我估计我只用得到到英语和中文。
from manim import *

class Example(Scene):
    def construct(self):
        text_1 = Text("Hello world", font_size=100)
        text_2 = Text("你好,世界", font_size=100)
        text_3 = Text("こんにちは,せかい", font_size=100)
        text_4 = Text("안녕, 세계", font_size=100)

        self.add(text_1.shift(UP*2))
        self.add(text_2.next_to(text_1, DOWN))
        self.add(text_3.next_to(text_2, DOWN))
        self.add(text_4.next_to(text_3, DOWN))
图 2.2: 各语言文本示例
字体
首先你得知道你能使用哪些字体,使用下面的代码查看你能使用的字体。
然后,为
font参数赋值即可选择对应字体,如Text('Hello', font='Times New Roman')斜体和粗细
slant
参数
slant控制斜体,可选值为NORMAL、ITALIC、OBLIQUE。后两个都表示斜体,但ITALIC表示’Roman Style’,OBLIQUE表示’Italic Style’,存在细微区别。如Text("Hello world", slant=ITALIC)。weight
参数
weight控制字体粗细,粗细程度从小到大为THIN、ULTRALIGHT、LIGHT、BOOK、NORMAL、MEDIUM、SEMIBOLD、BOLD、ULTRABOLD、HEAVY、ULTRAHEAVY。如Text("Hello world", weight=BOLD)。

图 2.3: 斜体与粗细示例
颜色
纯色
纯色可通过
color参数为文本设置颜色,例如Text('Hello World', color=BLUE)。渐变色
渐变色可通过
gradient参数进行设置。gradient参数接受一个元组,里面每个元素都是颜色常量,并且其顺序决定了渐变顺序。例如Text('Hello World', gradient=(BLUE, YELLOW, RED))。自定义文本颜色
有时你可能相对文本中的部分文字设置特定的颜色或者渐变色,此时你可以使用
t2c和t2g进行个性化设置。t2c参数用来设置部分文本的纯色。你可以为其传入一个字典,用切片的方式定位目标文本或者直接传入目标文本来进行上色。例如Text('Hello World', t2c={'[1:4]':BLUE, 'rld':RED})。t2g参数用来设置部分文本的渐变色。同理,也是接收一个字典,只不过这里的值要变为元组。例如Text('明天你还在这里吗', t2g={'[1:4]': (BLUE, YELLOW), '这里': (YELLOW, RED)})。t2g可能存在bug,会导致不能对目标文本进行渐变色设置,可能整个文本都会被设置渐变色。如下面的t_4。能被切片的方式选择字符说明
Text()字符串对象是可迭代的、可被索引的。
from manim import *

class Example(Scene):
    def construct(self):
        t_1 = Text('Hello World', color=BLUE)
        t_2 = Text('Hello World', gradient=(BLUE, YELLOW, RED))
        t_3 = Text('Hello World', t2c={'[1:4]':BLUE, 'rld':RED})
        t_4 = Text('Hello World', t2g={'[1:4]':(BLUE, YELLOW), 'rld':(YELLOW ,RED)})
        t_5 = Text('明天你还在这里吗', t2g={'[1:4]': (BLUE, YELLOW), '这里': (YELLOW, RED)})

        self.add(t_1.shift(2*UP))
        self.add(t_2.next_to(t_1, DOWN))
        self.add(t_3.next_to(t_2, DOWN))
        self.add(t_4.next_to(t_3, DOWN))
        self.add(t_5.next_to(t_4, DOWN))

图 2.4: 文本颜色
大小
font_size
font_size是Text()的参数值(默认为font_size=48),可直接在Text()中设定,如Text('Hello World', font_size=50)。scale
scale是Text()的属性,用于调整字体大小的倍数,如Text('Hello World').scale(0.5)表示默认大小的0.5倍。

图 2.5: 文本颜色
貌似这里也有bug,t_2被设置了渐变色。
行间距与换行
在字符串中可以添加
\n实现换行效果,并通过Text()中的line_spacing来调整行间距,如下所示。
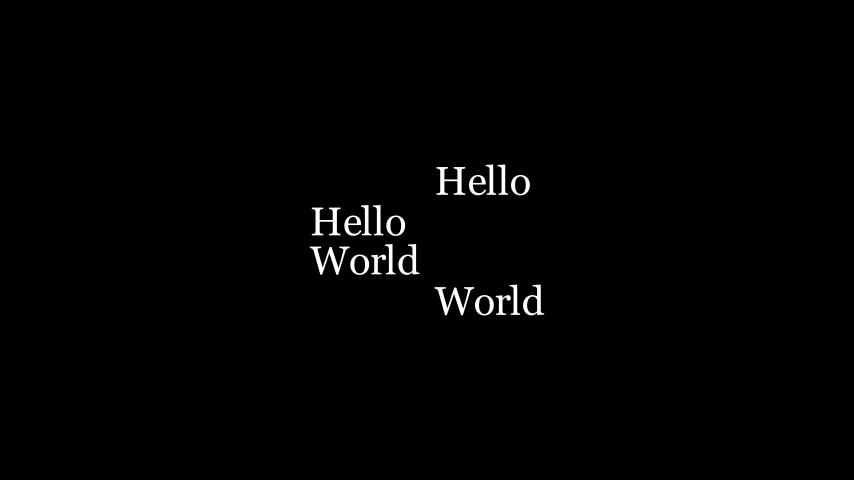
图 2.6: 行间距与换行
2.5.2 MarkupText
class MarkupText(text, fill_opacity=1, stroke_width=0, color=None, font_size=48, line_spacing=-1, font='', slant='NORMAL', weight='NORMAL', justify=False, gradient=None, tab_width=4, height=None, width=None, should_center=True, disable_ligatures=False, warn_missing_font=True, **kwargs)| 方法 | 属性 |
|---|---|
| font_list | animate |
| animation_overrides | |
| color | |
| depth | |
| fill_color | |
| font_size | |
| hash_seed | |
| height | |
| n_points_per_curve | |
| sheen_factor | |
| stroke_color | |
| width |
继承自
SVGMobject
MarkupText即使用了PangoMarkup的标记文本,和html语言类似,他允许使用“标签”来直接修改对应“标签”内的文本样式。
PangoMarkup is a small markup language like html and it helps you avoid using “range of characters” while coloring or styling a piece a Text.
下面罗列了一些常见的标签:
<b>bold</b>, <i>italic</i> and <b><i>bold+italic</i></b>

<ul>underline</ul> and <s>strike through</s>

<tt>typewriter font</tt>

<big>bigger font</big> and <small>smaller font</small>

<sup>superscript</sup> and <sub>subscript</sub>

<span underline="double" underline_color="green">double underline</span>

<span underline="error">error underline</span>

<span overline="single" overline_color="green">overline</span>

<span strikethrough="true" strikethrough_color="red">strikethrough</span>

<span font_family="sans">temporary change of font</span>

<span foreground="red">temporary change of color</span>

<span fgcolor="red">temporary change of color</span>

<gradient from="YELLOW" to="RED">temporary gradient</gradient>
<tt>标签内的字体就像打字机打出来的一样
<sup>和<sub>分别表示上标和下标foreground和fgcolor都是作用于文本颜色(貌似效果一样?)
在<span>标签里可以使用十六进制颜色(如#ff0000)或者CSS命名颜色(如Coral)。如果你想在其中继续使用Manim的颜色常量,那么你就得在字符串前添加f,以格式化的形式嵌入颜色常量(如MarkupText(f'<span fgcolor="{RED}">Hello</span>'))。
from manim import *

class Example(Scene):
    def construct(self):
        t_1 = MarkupText('Do you need <tt>help</tt>?')
        t_2 = MarkupText('H<sub>2</sub>O and OH<sup>+</sup>')
        t_3 = MarkupText('<span foreground="red">Hello</span>')
        t_4 = MarkupText('<span fgcolor="red">Hello</span>')
        t_5 = MarkupText('<span fgcolor="#ff0000">Hello</span>')
        t_6 = MarkupText('<span fgcolor="Coral">Hello</span>')
        t_7 = MarkupText(f'<span fgcolor="{RED}">Hello</span>')

        group = VGroup(t_1, t_2, t_3, t_4, t_5, t_6, t_7)
        self.add(group.arrange(DOWN))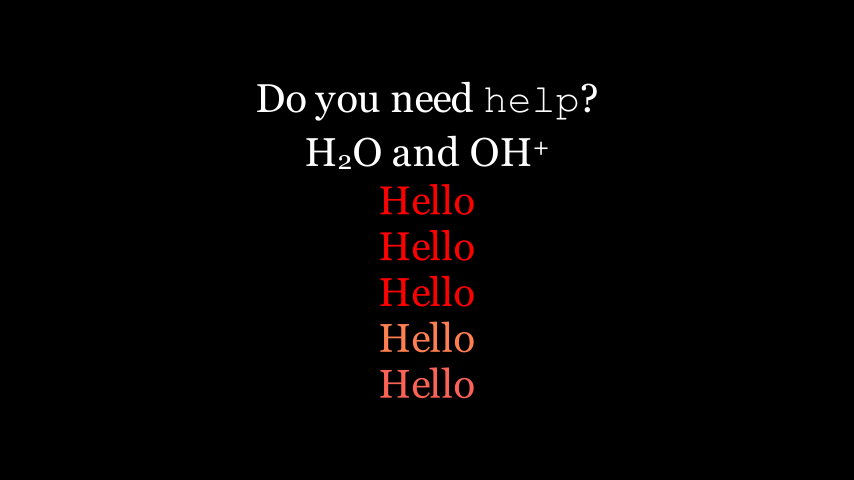
图 2.7: span示例
<gradient>支持十六进制颜色或者Manim自带的颜色常量。但<gradient>在实际应用中稍显复杂。对于带连字ligatures(姑且翻译为“连字”吧,有些语言会把两个或者多个字符视为一个字符,也就是连字)的语言,<gradient>有时并不能正确识别渐变色的起始字符与终止字符,起始字符和终止字符可能会提前或推迟。对此,你可以使用<gradient>的offset属性来调整起始字符和结束字符的位置。例如offset='1'表示起始字符提前一个位置;offset='1,2'表示起始字符提前一个位置,终止字符提前两个位置;又如offset=',-1'表示终止字符推迟一个位置。对于不依赖连字ligatures的语言,你可以直接在MarkupText()中设置disable_ligatures=True。
貌似中文可以不用考虑“连字”问题,英语的话可能会遇到
当你在一个字符串中使用了
<gradient>,并同时使用了overline或underline或strikethrough,你可能需要使用offset进行适当调整。
from manim import *

class Example(Scene):
    def construct(self):
        t_1 = MarkupText('我想打<gradient from="BLUE" to="GREEN">羽毛球</gradient>')
        t_2 = MarkupText('hello <gradient from="RED" to="YELLOW">world</gradient> bye')
        t_3 = MarkupText('hello <gradient from="RED" to="YELLOW" offset="1,2">world</gradient> bye')
        t_4 = MarkupText('<span underline="double" underline_color="green">Do</span> <gradient from="RED" to="YELLOW">you need</gradient> help?')
        t_5 = MarkupText('<span underline="double" underline_color="green">Do</span> <gradient from="RED" to="YELLOW" offset="-2">you need</gradient> help?')
        t_6 = MarkupText('<span underline="single" underline_color="green">Do</span> <gradient from="RED" to="YELLOW" offset="-1">you need</gradient> help?')

        group = VGroup(t_1, t_2, t_3, t_4, t_5, t_6)
        self.add(group.arrange(DOWN))
图 2.8: gradient示例
如果你需要在文本中使用<、>和&,得进行转义,用<、>、&依次替代。
MarkupText()中的参数justify=True能够实现文本左右对齐,如下面所示。
from manim import *

class Example(Scene):
    def construct(self):
        ipsum_text = (
            "Lorem ipsum dolor sit amet, consectetur adipiscing elit."
            "Praesent feugiat metus sit amet iaculis pulvinar. Nulla posuere "
            "quam a ex aliquam, eleifend consectetur tellus viverra. Aliquam "
            "fermentum interdum justo, nec rutrum elit pretium ac. Nam quis "
            "leo pulvinar, dignissim est at, venenatis nisi."
        )
        justified_text = MarkupText(ipsum_text, justify=True).scale(0.4)
        not_justified_text = MarkupText(ipsum_text, justify=False).scale(0.4)
        just_title = Title("Justified")
        njust_title = Title("Not Justified")
        self.add(njust_title, not_justified_text)
        self.play(
            FadeOut(not_justified_text),
            FadeIn(justified_text),
            FadeOut(njust_title),
            FadeIn(just_title),
            run_time=5
        )
        self.wait(1)
python会自动将圆括号中的几个连续无间隔字符串拼接在一起。
2.5.3 Paragraph
class Paragraph(*text, line_spacing=-1, alignment=None, **kwargs)| 方法 | 属性 |
|---|---|
| animate | |
| animation_overrides | |
| color | |
| depth | |
| fill_color | |
| height | |
| n_points_per_curve | |
| sheen_factor | |
| stroke_color | |
| width |
继承自
VGroup
Paragraph适合用于大段文本,它将每一行视作VGroup的一个元素。Paragraph主要接收text、line_spacing、alignment这三个参数。
text
每一行的内容将作为独立的字符串输入进去,例如
Paragraph('再见了妈妈', '我今晚就要远航', '别为我担心')就表示第一行为“再见了妈妈”,第二行为“我今晚就要远航”,第三行就是“别为我担心”。line_spacing
控制行间距,默认为-1,表示自动调整行间距。
alignment
对齐方式,默认为
None,可选值为'center'、'left'、'right'。
from manim import *

class Example(Scene):
    def construct(self):
        paragraph = Paragraph('再见了妈妈', '我今晚就要远航', '别为我担心',
                              alignment = 'center', line_spacing = 2)
        paragraph.color = '#FFB6C1'

        self.add(paragraph)
图 2.9: Paragraph示例
2.5.4 Tex
class Tex(*tex_strings, arg_separator='', tex_environment='center', **kwargs)| 方法 | 属性 |
|---|---|
| animate | |
| animation_overrides | |
| color | |
| depth | |
| fill_color | |
| font_size | |
| hash_seed | |
| height | |
| n_points_per_curve | |
| sheen_factor | |
| stroke_color | |
| width |
继承自
MathTex在
Tex()中也可像Text()一样直接设置color、font_size等参数。因为往上有相同的父类
使用Tex()即可插入LaTeX。由于LaTeX经常使用特殊字符(例如’\’),这在python中也具有特殊意义,所以推荐使用Tex(r'字符串')来输入字符串。
from manim import *

class Example(Scene):
    def construct(self):
        t1 = Tex('Hello', 'World', 'Bye', arg_separator='-')

        self.add(t1)
图 2.10: Tex示例
2.5.5 MathTex
class MathTex(*tex_strings, arg_separator=' ', substrings_to_isolate=None, tex_to_color_map=None, tex_environment='align*', **kwargs)| 方法 | 属性 |
|---|---|
| get_part_by_tex | animate |
| get_parts_by_tex | animation_overrides |
| index_of_part | color |
| index_of_part_by_tex | depth |
| set_color_by_tex | fill_color |
| set_color_by_tex_to_color_map | font_size |
| set_opacity_by_tex | hash_seed |
| sort_alphabetically | height |
| n_points_per_curve | |
| sheen_factor | |
| stroke_color | |
| width |
继承自
SingleStringMathTex关于如何编辑数学公式大家可以参考这篇博客。
MathTex()中的字符串默认处在数学环境中,对应有Tex(r'$字符串$'),相当于是数学公式的Tex()简写。
from manim import *

class Example(Scene):
    def construct(self):
        t1 = MathTex(r'f(k)={n \choose k}p^{k}(1-p)^{n-k}')
        t2 = Tex(r'$f(k)={n \choose k}p^{k}(1-p)^{n-k}$')

        self.add(t1.shift(UP))
        self.add(t2.shift(DOWN))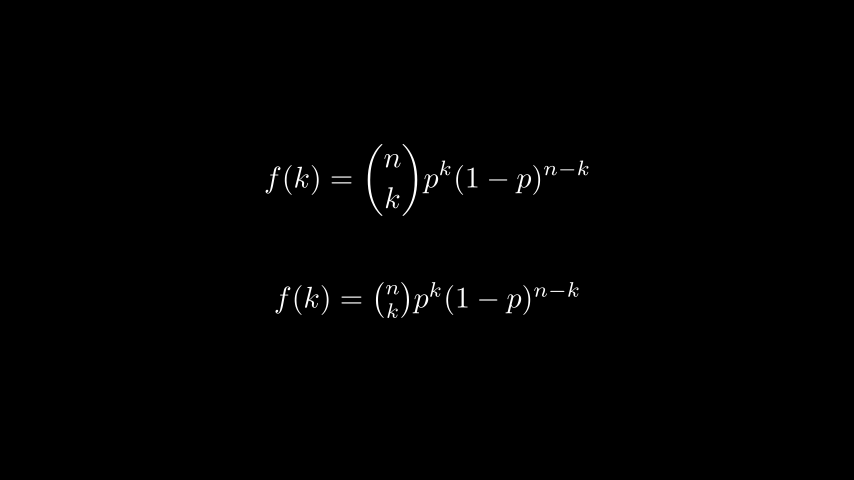
图 2.11: MathTex示例
字符串上色
MathTex能够接收多个字符串,最后会用arg_separator参数(默认为空格)将其隔开。对此,可以通过索引或者字符匹配(匹配的结果是对应的完整字符串)来选中特定的字符串进行设置,如下所示:Tex()也同样适用,毕竟其父类就是MathTex()。from manim import * class Example(Scene): def construct(self): tex_1 = Tex('Hello', r'$\bigstar$', r'\LaTeX', font_size=58) tex_1[1].set_color(RED) tex_2 = MathTex(r'\sum_{i=0}^n i^2', '=', r'\frac{(n^2+n)(2n+1)}{6}', font_size=58) tex_2.set_color_by_tex('i=', RED) self.add(tex_1.shift(UP)) self.add(tex_2.shift(DOWN))
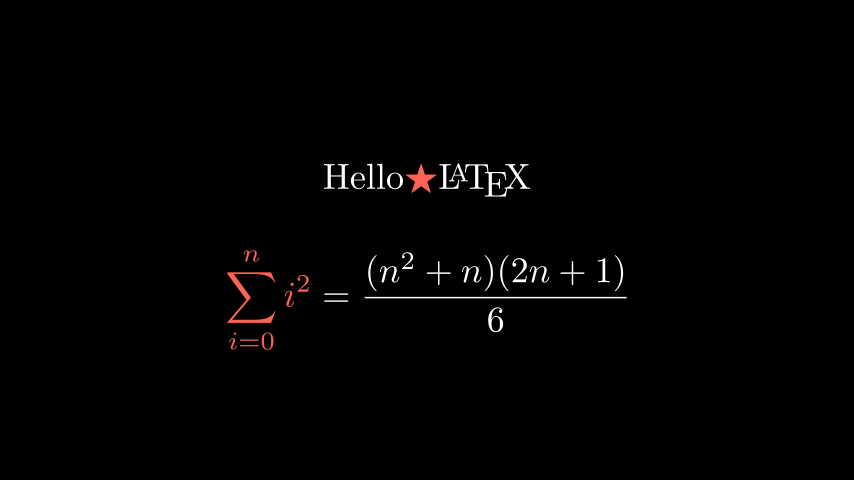
图 2.12: 子字符串上色示例
目标字符上色
如果想要匹配某个字符而不是字符所在的整个字符串,则可以用到
substrings_to_isolate参数,它能够在set_color_by_tex时将目标字符串单独分离出来。或者用两对花括号{{.}}将目标字符框起来也能起到同样作用。二者如下所示:from manim import * class Example(Scene): def construct(self): e_1 = MathTex( r'e^x = x^0 + x^1 + \frac{1}{2} x^2 + \frac{1}{6} x^3 + \cdots + \frac{1}{n!} x^n + \cdots' ) e_1.set_color_by_tex('x', BLUE) e_2 = MathTex( r'e^x = x^0 + x^1 + \frac{1}{2} x^2 + \frac{1}{6} x^3 + \cdots + \frac{1}{n!} x^n + \cdots', substrings_to_isolate='x' ) e_2.set_color_by_tex('x', BLUE) e_3 = MathTex( r'e^{{x}} = {{x}}^0 + {{x}}^1 + \frac{1}{2} {{x}}^2 + \frac{1}{6} {{x}}^3 + \cdots + \frac{1}{n!} {{x}}^n + \cdots' ) e_3.set_color_by_tex('x', BLUE) group=VGroup(e_1, e_2, e_3) self.add(group.arrange(DOWN))
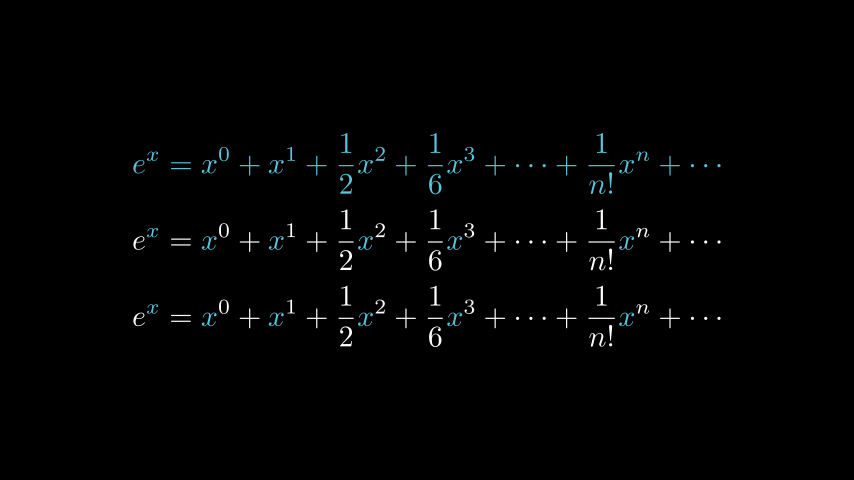
图 2.13: 目标字符上色示例
除了多个字符串的索引,还可以对一个字符串(即Mobject对象)中的不同组成部分进行索引。index_labels()能够显示Mobject对象的组成部分的索引,如下所示:
from manim import *

class Example(Scene):
    def construct(self):
        text = MathTex(r"\binom{2n}{n+2}", font_size=96)

        # MathTex中仅有一个字符串,所以只索引了第一项
        # 若有多个字符串则可以通过对应的索引选中目标字符串
        self.add(index_labels(text[0]))

        text[0][1:3].set_color(YELLOW)
        text[0][3:6].set_color(RED)
        self.add(text)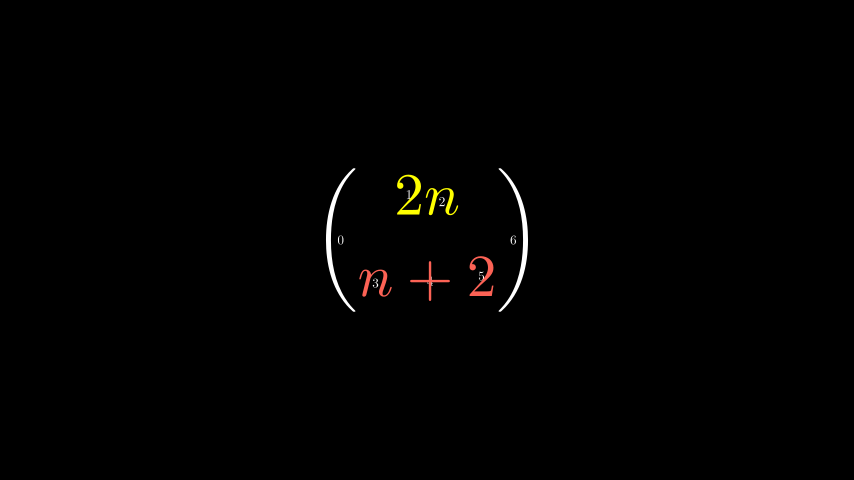
图 2.14: 目标字符上色示例
- 字体
MathTex()可通过tex_template参数来修改字体。在TexFontTemplates类中有诸多字体可供选择,通过提取其属性值来进行赋值,例如tex_template = TexFontTemplates.french_cursive。可选字体如官网所示。
2.5.6 Title
class Title(*text_parts, include_underline=True, match_underline_width_to_text=False, underline_buff=0.25, **kwargs)| 方法 | 属性 |
|---|---|
| animate | |
| animation_overrides | |
| color | |
| depth | |
| fill_color | |
| font_size | |
| hash_seed | |
| height | |
| n_points_per_curve | |
| sheen_factor | |
| stroke_color | |
| width |
继承自
Tex
Title的作用就是在画面正上方显示标题。如果你想在标题中输入中文,那么一定要设置tex_template参数,并为其赋值为tex_template = TexTemplateLibrary.ctex。
Tex若想显示中文也得这样设置,但一般用Text来显示中文会更多。
from manim import *

class Example(Scene):
    def construct(self):
        banner = ManimBanner()
        title = Title('Hello你好', tex_template=TexTemplateLibrary.ctex, match_underline_width_to_text=True)
        self.add(banner, title)
图 2.15: Title示例
2.5.7 BulletedList
class BulletedList(*items, buff=0.5, dot_scale_factor=2, tex_environment=None, **kwargs)| 方法 | 属性 |
|---|---|
| fade_all_but | animate |
| animation_overrides | |
| color | |
| depth | |
| fill_color | |
| font_size | |
| hash_seed | |
| height | |
| n_points_per_curve | |
| sheen_factor | |
| stroke_color | |
| width |
继承自
Tex
BulletedList实际上就是markdown中的无序列表。
from manim import *

class Example(Scene):
    def construct(self):
        blist = BulletedList('项目 1', '项目 2', '项目 3', height=2, width=2, tex_template=TexTemplateLibrary.ctex)
        blist.set_color_by_tex('1', RED)
        blist.set_color_by_tex('2', GREEN)
        blist.set_color_by_tex('3', BLUE)
        self.add(blist)
图 2.16: BulletedList示例